The right decal kit for a VW Transporter or Multivan depends on three things: your generation (T4, T5, T6, T6.1 or the 2022+ Multivan), your wheelbase (SWB or LWB), and the look you want. The most popular styles are topographic side decals, mountain window graphics and retro stripes. This guide covers which kits fit which van, how cut and printed decals differ, and how to apply and remove them without damaging the paint.
Key Takeaways
- Check your generation first. Most of our side kits fit T4, T5 and T6, several also cover T6.1, and the 2022+ Multivan (often called the T7) has its own kits.
- The new Transporter sold from 2025 is built on the Ford Transit Custom and has a different body. Kits for T4 to T6.1 won't fit it.
- Single-colour kits are cut from ORACAL 551 vinyl and go on wet or dry. Printed kits use air-release ORAJET vinyl and go on dry.
- A side kit takes about 30 to 60 minutes to fit. Apply above +8 °C on clean, wax-free paint.
Which VW Transporter generation do you have?
Not every kit fits every van, so start here. Panel lines changed slightly between generations, and the Multivan sold since 2022 is a different vehicle altogether.
| Generation | Years | Decal fitment |
|---|---|---|
| T4 | 1990–2003 | Flatter side panels, good for full-length stripes. Choose kits marked T4. |
| T5 / T5.1 | 2003–2015 | The widest choice of kits. SWB and LWB versions available. |
| T6 | 2015–2019 | Slightly revised panel lines. Most T5 kits fit. |
| T6.1 | 2019–2024 | Same body as the T6 with a new front. Choose kits that list T6.1. |
| Multivan (T7) | 2022–present | A new passenger-car platform with different windows and body lines. Needs dedicated T7 kits. |
| New Transporter | 2025–present | Based on the Ford Transit Custom. T4 to T6.1 kits don't fit. Contact us about custom sizing. |
T6.1 production ended in 2024. Volkswagen's 2025 Transporter is built alongside the Ford Transit Custom at Ford Otosan in Turkey (promobil). The current Multivan, revealed in 2021 and sold from 2022, is a separate MQB-based passenger model. Check whether your van is SWB or LWB too, because side stripes and window kits come in both lengths.
Design ideas: what looks good on a Transporter
The Transporter's long, flat side panels make a good canvas. These are the styles our customers choose most.
Topographic side decals

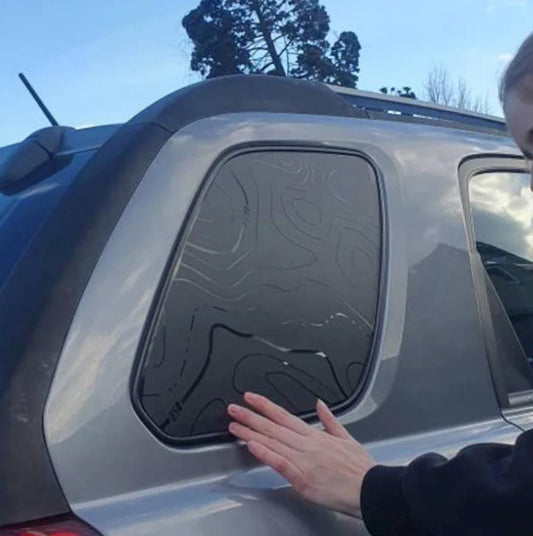
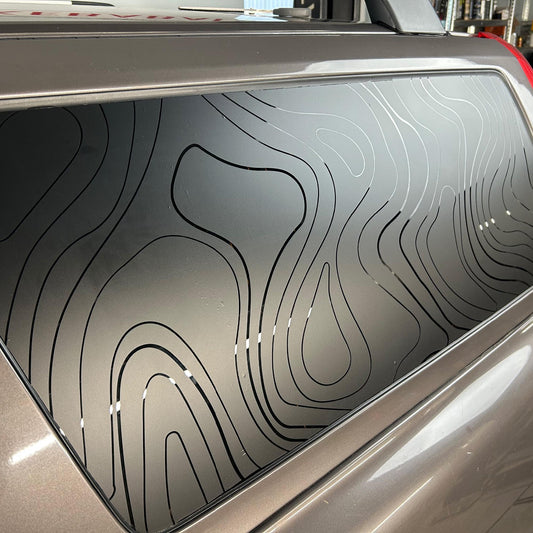
Contour lines are our most popular VW style. They give the van an outdoor look that suits both a working Transporter and a Multivan camper. These kits are cut from single-colour ORACAL 551 vinyl and ship with transfer tape, in matte or gloss.
- VW Transporter Topographic Side Decals (T5, T6, T6.1, Multivan)
- VW Transporter Multivan Topographic Side Stripes (T4, T5, T6)
- VW Transporter Side Topographic Decals (T4, T5, T6, Multivan)
- VW Transporter Mountain & Topographic Side Stripe Kit, printed side wrap (T4, T5, T6)
Window graphics

A mountain or canyon scene on the rear side windows is a subtle detail. Printed window kits cover more of the glass and add some privacy. Cut-line designs leave more of the window clear. Rules on decals on side and rear glass vary by country, so check yours before fitting.
- Topographic Mountain Window Decal Set (T5, T6, T6.1)
- Topographic Canyon Window Decal (T5, T6, T6.1)
- Misty Forest Mountain Window Decals (T5, T6, T6.1)
- Mountain Range Window Decal, cut vinyl pair (T5, T6)
Retro and camper stripes

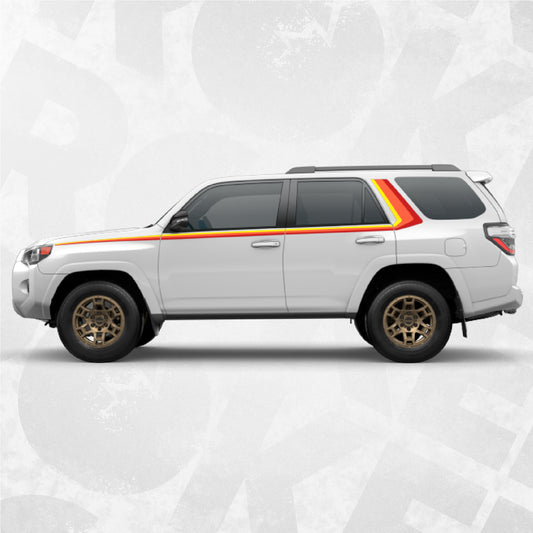
Multi-colour stripes suit converted campers and weekend vans. They're printed on air-release wrap vinyl and laminated, so the colour gradients stay sharp outdoors.
- VW Transporter Retro Mountain Side Stripe Set (T4, T5, T6)
- Mountain Sunset Side Stripe Decals (T4, T5, T6)
- Mountain Side Stripe Decal Set, SWB and LWB
- VW Transporter Multivan Side Stripe: CAMPER
Logo and accent decals
Smaller accents work on their own or alongside a stripe kit:
- Volkswagen Transporter Topographic Decal with VW Logo, set of 2 (T5, T6, T6.1)
- VW Logo Topographic Map Quarter Panel Decals
- VW Transporter Compass Decals, set of 2
- Topographic Map Front Door Graphics, set of 2 (T4 to T6.1)
Kits for the Multivan T7 (2022+)

The current Multivan has a different window shape and body line, so it needs kits made for it:
- Topographic Rear Window Decal Kit for Multivan T7
- Multivan T7 Grey Gradient Side Stripe Rocker Panel Wrap
- Hippie Flower Van Decals Kit (T4 to T7)
Cut vinyl or printed decals: what's the difference?
Our VW kits come in two constructions. Knowing which one you have tells you how to apply it.
| Cut vinyl | Printed wrap vinyl | |
|---|---|---|
| Film | ORACAL 551, single colour | ORAJET 3551RA with laminate |
| Best for | Contour lines, silhouettes, text, glass | Gradients, multi-colour scenes, large stripes |
| Supplied with | Transfer tape on top | Air-release adhesive. Large panels come in one piece; detailed shapes may come with application tape. |
| Application | Dry or wet | Dry only. Air-release channels let trapped air escape. |
| Rated outdoor life | 5–7 years, depending on the kit | 5–7 years laminated |
ORAFOL lists a minimum application temperature of +8 °C for ORACAL 551 (ORACAL 551 technical data sheet). Use the same limit for printed kits, and work in a garage on cold days.
How to apply decals to a VW Transporter
A side kit takes about 30 to 60 minutes. You'll need isopropyl alcohol (70%+), a microfibre cloth, a felt-edge squeegee, masking tape and a heat gun or hair dryer.
- Clean the panel. Wipe it with isopropyl alcohol to remove wax, polish and grease, then let it dry completely. Adhesion depends on this step.
- Position and hinge. Hold the decal against the panel and tape a masking-tape hinge along the top edge. Step back and check that it's level with the body line before you commit.
- Peel and lay down. Fold the decal up, peel the backing paper away and lower the decal onto the panel. Squeegee from the top down in firm, overlapping strokes, pushing air out towards the edges.
- Remove the transfer tape. If your kit has transfer or application tape on top, peel it back slowly at a low angle, almost parallel to the panel. If part of the design lifts, press it down and wait a minute before trying again.
- Final press and heat. Squeegee the whole decal once more, then warm it gently with a heat gun to help the vinyl settle into panel curves, rivets and recesses. Keep the gun moving so you don't overheat the film.
For a step-by-step example on glass, see our dry-method topographic window decal guide. For the wet method, see how to install car window vinyl decals.
How to remove decals without damaging your paint
- Warm the vinyl with a heat gun or hair dryer. About 30–40 seconds per section is enough.
- Lift a corner with your fingernail or a plastic trim tool and peel slowly at a low angle.
- Remove any adhesive residue with isopropyl alcohol or a dedicated adhesive remover.
- Wash and wax the panel to restore the finish.
On factory paint in good condition, both film types are designed to come off without damaging the surface. Resprayed or chipped paint is more likely to lift, so test a small corner first. Our decal removal guide goes into more detail.
Ready to customise your Transporter?
All our VW kits are pre-cut or supplied as a sheet to trim, and come with fitting instructions. Free shipping is available on qualifying orders. Not sure a kit fits your van, or have a 2025+ Transporter? Send us your model, year and wheelbase before ordering and we'll confirm.
Plain and lettered stripe kits:
- VW Transporter Side Decals: BLANK
- VW Transporter Multivan Side Decals: EDITION
- VW Transporter Side Stripe Decals: TRANSPORTER
- VW Transporter T5 T6 Mountain Side Stripe Kit (SWB)
About the author: Darius Sulcius is the founder of BROKENstickers. He designs, cuts and installs the decals we sell from our workshop in Lithuania. More about BROKENstickers.